
Every owner of an acoustic guitar must regularly string or have their instrument professionally tuned. However, it is a simple enough process that you can do it on your own to save time and money.
This guide tells you everything you need to know about acoustic guitar strings and how to change the wires for yourself.
Table of Contents
When You Should Change the Guitar Strings
- When your guitar tone has become flat over time because the strings are wearing out
- When it’s harder than usual to stay in tune with your guitar
- When the string wraps are unraveling and revealing the core
- When you cannot recall the last time you had the strings changed
How Frequently Should I Change My Guitar Strings?

So you are on board with changing the strings, but how often should you change them? While the general opinion tends to lean towards changing them once a month, there is no one-size-fits-all answer.
We realize that there are a number of factors that could reduce the lifespan of a guitar’s strings. Here are a few of them:
- Performers who perspire a lot while playing. The sweat is acidic and will cause some erosion.
- Excited players who pluck hard or bend the strings frequently will wear them out faster.
- Anyone who plays their instrument frequently will wear out strings faster.
- Players who have a tendency to adjust tuning often.
- Anyone who has a cigarette while playing or strums in smoky environments.
Remember, even brand-new guitars are not exempted from a change of strings. This is because the musical instrument may have already been on the shelves for months without new strings.
What You Need To Change Acoustic Guitar Strings
Make sure that you have a pack of actual acoustic guitar strings if you are doing this by yourself. There are different kinds of strings with varying thicknesses and materials.
Get ready for this task with the following items:
- Your acoustic guitar
- Strings made specifically for an acoustic guitar
- A string cutter
- String winder
- A flat work surface
- Some music
- We recommend your favorite beverage to soothe you. Changing strings can be frustrating for beginners.
Important: If it is your first attempt at changing a guitar string, use a cheap guitar string. Light-gauge strings typically cost on the lower side and are ideal for practice.
How to Change Your Guitar Strings
Relax the strings
Loosening a guitar string is done either using a string winder or by hand. You will know it’s loose enough when it doesn’t make any sound.
Start by relaxing the thinnest string also known as the E string and use a winder or your hand to release the tautness.
If you are not sure which direction loosens the string, pluck the E note as you turn the string. If the pitch increases, turn it the other way round.
Repeat this process for all the strings until all are lying against the fret.
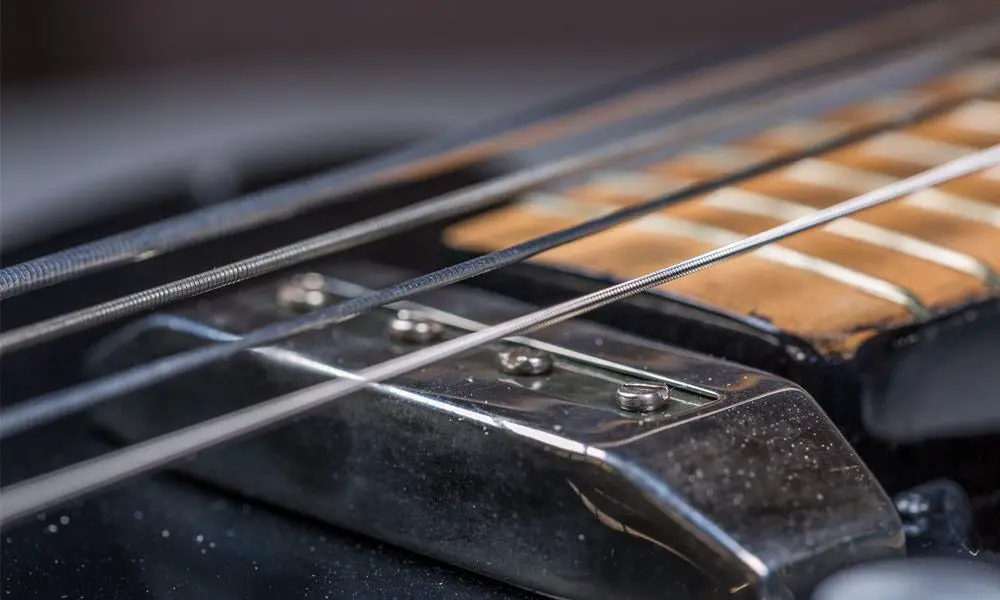
Cut the Strings
Use your string cutter for this next step to cut away the strings surrounding the soundhole.
- Be careful to aim the cutter higher up the sound hole so that you do not scratch the sleek guitar coating.
- Cut them one at a time. Snipping is the most satisfying part of the process.
Take out the Strings
The next step is to take out the bridge pins. A string winder will once again be handy in this step.
Bridge pins refer to the peg-like structures on the bridge of the guitar.
String winders contain a notch that fastens on the head of the pin so that it is easy to pluck them out.
Important: Once you have the bridge pin secured in the string winder, pull it upwards as straight as possible. You must never pull up the pin at an angle, otherwise it will break.
When you are through with the ball-end section of the string, move to the other half of the string fastened to the headstock. Unwind this second half of string, taking care not to touch the sharp tips.
Now that all the strings are out, wind them in a circle for disposal so that they do not accidentally hurt another person.
Wipe the Guitar (Optional)
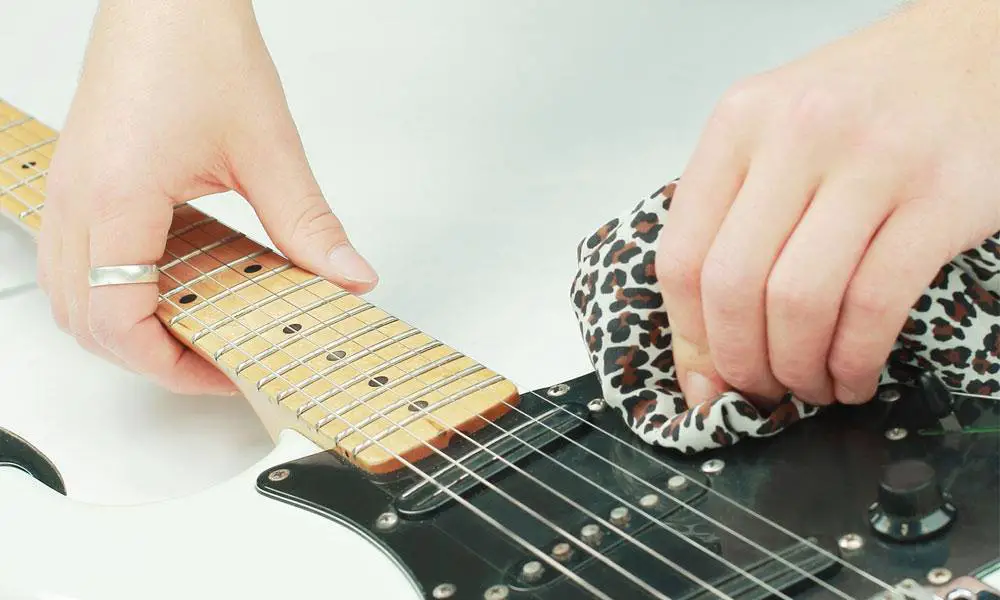
With all the strings out of the way, you can clean the previously remote spots. This will not be necessary for some guitars.
However, if you must clean your instrument, take a clean dry cloth and run it across the guitar.
Cover the bridge, headstock, and fretboard. Dust usually nests under these places because they are so tough to access.
Spread out the Strings
Identify each of the stings in your pack and lay them out. If you have never done this before, note that each string has a label.
- Strings are usually marked by their gauge. Where there are no labels, there will be color codes. The code is translated on the packaging, each color represents a gauge.
- In other instances, the strings come wrapped singularly in the packaging. The gauge of each string is pinned on the sleeve.
- The bigger the number, the heavier the string. This will be how you know the placement of each string.
The string with the lowest number is the high E string. On the other hand, the one with the highest number is the low E string.
Start with the low E string, opening the box slowly away from your body. Guitar strings are known to uncoil suddenly and can cause an injury.
There are packets of string for every budget. Some are sold at throwaway prices, while others cost a fortune.
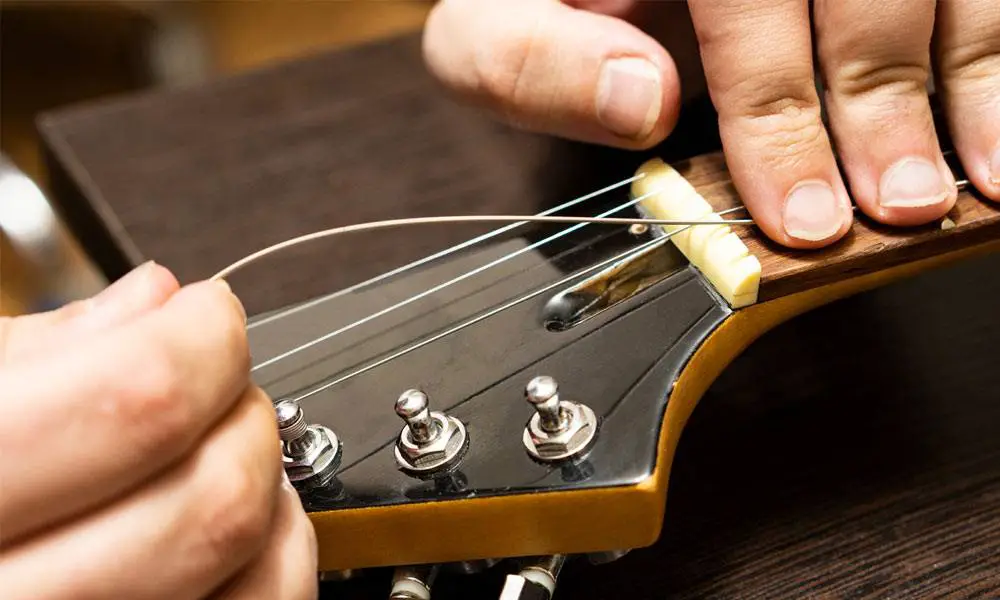
Threading Your Guitar Strings
Start by threading the low E, followed by the A string. Next is the D string, and so forth.
Pick out the low E string, and press the ball-end on the bridge pin, creating a slight bend on the string.
Bending the string is to help the ball-end rest against the bridge plate once it is inside the guitar. Next, put the ball-end of this guitar string through the hole where the low E goes into.
Finally, press the bridge pin inside the hole to fasten the string. Apply moderate pressure on the pin.
If mild pressure is not sufficient to stick in the bridge pin, pull it out and try again. Repeat the procedure for all the strings.
Feel free to use your string winder again to make everything easier for you.
Stretch and Tune

Congratulations – you are almost done!
It is possible to tune every one of your strings and play at this juncture. However, you have to be gentle with your plucking. This is because the strings are still fresh, and anything less than a gentle tug will cause it to go out of tune.
Gentle tugs will speed up stretching. It is crucial to stretch fresh strings before they settle.
The next and final part of tuning will take at least twenty minutes of your time. You will learn how to string the guitar tuners.
Begin this stage by using a carpenter’s pencil to smear the nut grooves with graphite. (Graphite is an excellent lubricant.)
Lubricating allows guitar strings to slide across the nuts smoothly. This will get rid of tuning difficulties once you have strung the guitar.
How to Install a String at the Tuning Posts
- Glide the pointed end of the low E string into the tuning post through the hole in the center.
- Tug on the tail of the string through the tuning post hole and place the string in the designated nut slot. Once the string is taut, using your hand at the fretboard, generate some slack on the tuning post.
- Wind this guitar string, ensuring that the first full rotation of the tuning post passes over the open end of the string. This is to ensure that the string is secured in place.
- We cannot stress enough that the first wrap of the string at the tuning post should go over the loose end of the wire. The first wrap must not slip from the top either.
- The correct string winding direction is approaching the middle of the headstock. Turn the tuning peg accordingly.
- Keep winding the string, with each consecutive wind after the first going below the tail end of the string to the headstock.
- Finally, use the string cutters to closely cut the ends of the string. You don’t want it to get caught on anything.
- After you have successfully strung your first guitar, you are required to stretch and then tune it. Do this by placing one finger on the 12th fret and giving the string a gentle tug.
Further Guitar Maintenance Tips

- At the end of each playing session, give your strings a good wipe with a clean and dry cloth. This will prolong their lifespan.
- Wash your hands before handling your guitar strings. This will minimize string oxidation.
- Get a string winder. They are extremely budget friendly and will make string changing more efficient.
- Record the date you changed the strings and the type of strings you use. This helps to keep track of the age of your strings, as well as the model of strings you use.
- Consider buying guitar strings in bulk for convenience and economical spending. Players using light gauge acoustic strings should especially consider this since they break more often.
It is crucial for acoustic guitarists to change their strings regularly. Failure to do so adversely affects guitar tones and kills all the fun of playing your equipment. If you are looking for more ways to have fun with the guitar, consider taking part in Tony’s Acoustic Challenge.
How Acoustic Guitar Strings Work
Acoustic guitar strings have the biggest impact on the sound of the guitar. There are no amplifiers nor pickups on these musical instruments. Therefore, the gauge of these strings and material composition must be thoughtfully evaluated.
Explaining Acoustic Guitar String Gauges
Gauges refer to the range of thickness of guitar strings. The gauges are measured in one-thousandth of an inch.
- Normally, the lightest string gauge is .010 and the heaviest .059.
- String gauges determine how playable the acoustic guitar will be as well as the kind of tune.
- Most acoustic guitars are manufactured with medium or light gauge strands. These are also known as 13s or 12s respectively.
Characteristics of Light Gauge Strings
- Light gauges are more comfortable to play
- To a greater extent, these strings snap easily
- Light gauge strings on low action guitars are more susceptible to the annoying fret buzz
- The safest choice of strings for vintage guitars since they are gentle on the guitar neck
- Light strings have less sustain and lower volume
- Easier to fret and bend notes
Characteristics of Heavy gauge strings

- Typically, thicker strings are more difficult to play
- Produce a longer sustain and more volume
- Thicker gauge strings are taut, exerting greater tension on the neck of a guitar
- It takes heavy finger pressing to bend the notes and to fret
Manufacturer Guitar String Gauge Identification
Guitar manufacturers assign string identities in sets. According to this classification, there are five categories of guitar string gauges.
Exact gauge measurements might change slightly amongst different manufacturers. The following are the classifications of string gauges alongside their measurements.
- Extra light string gauge– .047 039 .030 .023 .014 .010
- Custom light string gauge– .052 .042 .032 .023 .015 .011
- Light string gauge– .054 .042 .032 .032 .025 .016 .012
- Medium string gauge- .056 .045 035 .026 .017 .013
- Heavy string gauge– .059 .049 .039 .027 .018 .014
How To Choose The Right String Gauge For Your Guitar
These are the factors you should consider before you choose your string gauge.
Mode of Playing – If you are a finger picker, a lighter gauge string is easier to strum in this style. On the other hand, if you are an excitable player that strums hard, go for the medium gauge strings.
If your style is a mix of finger picking and strumming, you should opt for light-medium strings.
The light-medium set of string gauge contains heavier gauges on the last three strings. The top three are light gauges.
Medium gauge strings will prove challenging to novice players.
Body Size – The rule of acoustic guitars is to use light gauges on small-bodied instruments. Larger bodied guitars are generally stringed with thicker gauges.
For instance. A jumbo or dreadnought will only sound decent if you use medium gauge strings. On the other hand, a small parlor guitar will produce better tunes with light string gauges.
Tone – What kind of tone are you looking for? We have established at this point that thicker strings emphasize the bass register. This is exactly why dreadnought guitars are treasured for their rich and strong tones.
Lighter gauges will accentuate treble notes, that way your strumming and picking techniques are not lost on an audience.
Age and Condition – When it comes to the age and condition of your instrument, the incorrect gauge will ruin it. Vintage instruments should be treated as fragile, and thick strings will cause its neck to bend and bridges will elevate.
If you are not sure the weight of the string that is safe for your guitar, contact the manufacturing company for advice.
If you are the proud owner of a vintage guitar, consult a qualified luthieror guitar tech.
What Acoustic Guitars Strings Sound Like According To Construction Materials

Aluminum Bronze – This string alloy will make you happy if you are a fan of bass. It produces a sustained bass and crispy clear high.
Silk and Steel – These strings have steel as the core, but with either copper, nylon, or silk wrapping for the lower wires. The wires produce delicate tunes and a soft touch. Silk and steel strings are popular with folk musicians and finger players.
Bronze – Bronze strings have a crisp, ringing, and lustrous sound. However, the melody is short-lived, since bronze strings tend to oxidize within a short time.
Phosphor Bronze – This is a copper, tin, and phosphorus alloy. It is basically a warmer version of the copper string. The sound is invigorating and the string’s lifespan is longer than pure bronze.
Brass – Brass strings have a lustrous, discordant metallic tone.
Polymer-coating – These stings have diminished sustain and treble, unlike their uncoated counterparts. They are resistant to corrosion and have high visual appeal.
Note: Dedicated manufacturers have come up with string alloys that last longer. One such company is Martin.
Eleven Best Guitar Strings You Can Purchase Right Now
1. Ernie Ball Aluminum Bronze Acoustic Guitar Strings
This aluminum bronze is arguably the best innovative guitar string on the market right now. It is made of uncoated steel core string with aluminum and bronze components.
They are long-lasting and will withstand sweaty acidic play sessions, high humidity, and extreme temperatures.
Ernie Ball strings wrap their wires with aluminum oxide as opposed to coating. This way, it does not compromise on sustain and volume.
This string is designed for both fingerstyle players and guitar pickers.
- Ernie Ball is suitable for both novice and experienced players
- Aluminum oxide provides excellent protection to the string against sweat and other external environmental factors.
- Aluminum oxide wrap does not compromise sound quality.
2. D’Addario Nickel Bronze Guitar Strings

If you are in a band, you may want to consider these D’Addario nickel bronze strings.
Plus, if you do not love coated guitar strings, then you will love these uncoated acoustic strings.
Uncoated strings have a short life-span, but their appeal lies in the quality of the sound it produces. The guitar will live to its full potential with these strings.
These springs contain a high carbon steel kernel, nickel-plated with phosphor bronze.
D’Addario nickel bronze strings emphasize the mid-range tunes that ensure that the guitar sound isn’t drowned among other instruments.
- These strings thrive in band settings
- Their lifespan is extremely shortened for being uncoated
- Does not interfere with the acoustic tone
3. Martin ‘Clapton’s Choice’ Acoustic Guitar Strings
These guitar strings are made out of phosphor bronze.
Unlike regular uncoated strings, these maintain their tone and tuning capabilities for a long time. They exceeded the capabilities of uncoated strings.
- Eric Clapton personally recommended these guitar strings
- Each pack of the strings is consistent with the previous
- Long-lasting strings
4. Gibson Masterbuilt Premium Guitar Strings
The Gibson company already has a stellar reputation for producing popular acoustic guitar brands. It is only right that they design equally excellent strings to accompany their instruments.
For centuries, the Gibson has been well-known for both the Hummingbird and J-45 acoustic guitars.
Gibson Master built Premium strings live up to their expectations. They are also uncoated phosphor bronze with a brilliant sound.
Note: Gibson string gauges differ slightly in thickness with other brands of similar gauge measurements. They tend to be thicker.
The excellent tone equals the durability of this string. It is a win-win situation.
- Guitar strings produced vivid sounds
- They are durable
- They are thick, which may be a challenge for learners
5. Fender Dura-tone Acoustic Guitar Strings
Fender strings are coated using patented technology. Despite a popular aversion to using coated strings, there are situations where it is necessary to use them.
- Such situations include under conditions of extreme humidity. Humidity acts quickly on the durability of a string, drastically shortening its lifespan.
- The tone and ability to tune the guitar is adversely affected by humidity.
- Sharing one guitar among different players contributes to a significant shortening of its lifespan.
To mitigate all three of these situations mentioned above, coated strings come into play. The Fender Dura-tone acoustic strings are our choice. According to this company, after micro-treatment, their fibers can last five times as long as uncoated strings.
Conclusion
Learning how to string a guitar is a skill that every instrument owner should acquire. Restringing an acoustic guitar is the only way to ensure excellent sound quality. Just remember, when you change your guitar strings, change all six of them at once to achieve an even tone.